Guys, I've had a ton of pm's about this thread, after photobucket wiped out the pictures. So, I'm bringing it back from the dead with the original pictures.I've seen a few post's where guys are wondering if you can/how to adjust the pan tension on MB 550's. Out of the last dozen I bought, none were below 3#, and 9 of the 12 were above 4#. 4 of them were above 5# pan tension.
Most people are content with the way these traps come. But there is a LOT of room for improvement if you want to take the time. Pan tension, pan height, and amount of travel before the pan breaks can all be changed and improved just by cleaning up[filing] the night latched dog. By careful filing of three(3) angles on the nightlatched dog, you can realize worlds of improvement on this system. I held the dogs on these traps in a vice while I was filing them.
First of all, here are the three places you need to clean up. (And remember, go EASY on the filing! Three strokes with a sharp file does a lot.) I used a "fine" file for all my tuning.
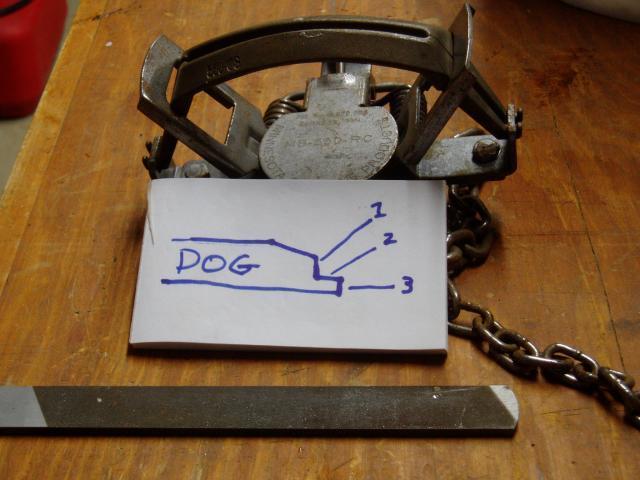
Square this angle(#1) up to 90 degrees. This will allow the pan to drop in, and sit nicely. The more material you take off coming towards the rear of the dog, the higher the pan will ride. Here it is.
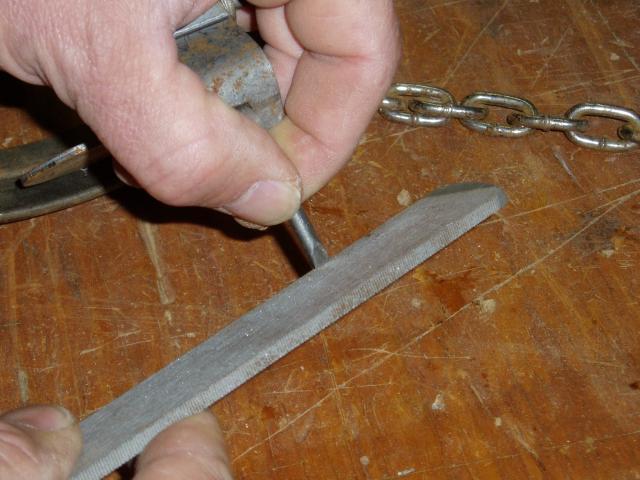
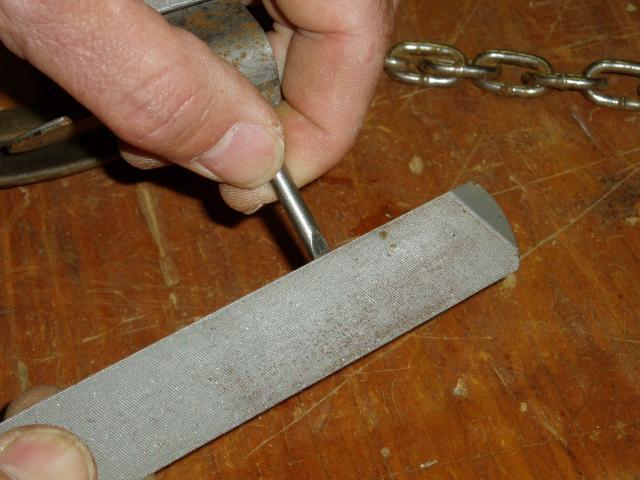
Now, the flat part(or angle#2) is the most important part to get right. This is where you can REALLY change your pan tension. Start by filing it flat, or 90 degrees from angle #1 where the pan drops down onto the dog. If after setting and tripping your trap(I used a trigger pull gauge to measure pan tension) you are happy with it, just leave it and go on to the last step. If you want to decrease pan tension, you can SLIGHTLY angle the file down...toward the end of the dog. These two pics show the file flat in the first, and slightly angled down in the second picture. If you change this angle to slightly down, it allows the pan to slide off the dog easier, thus the decreased pan tension.

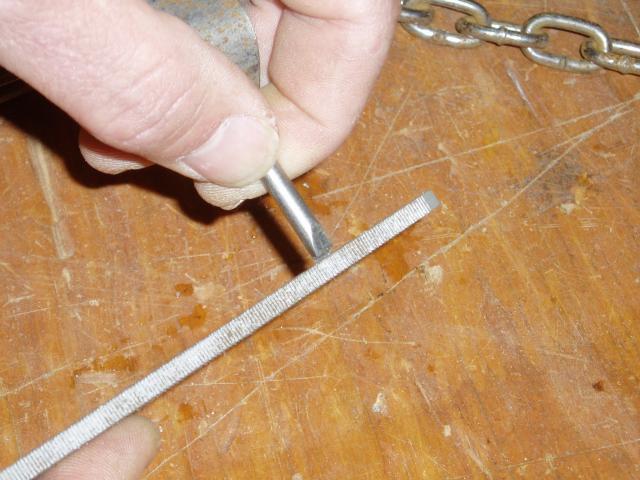
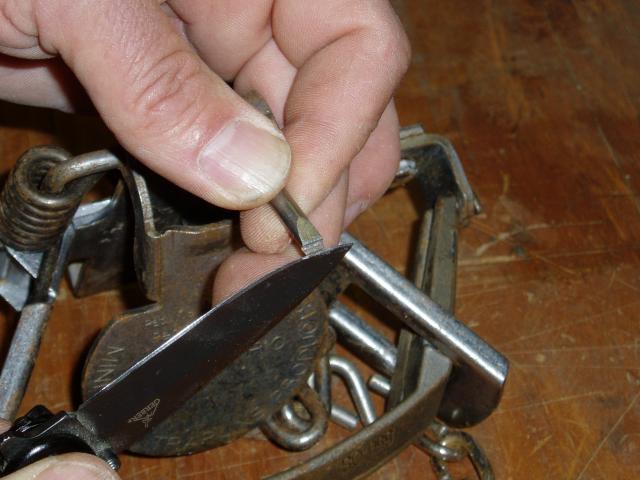
And the last angle, or spot to adjust is the END of the dog. Every one of my traps benefitted by filing some material off the end of the dog. This adjustment determines pan travel before the trap fires. When you are adjusting this, you'll have the trap set and be setting it off in your hand. You'll "feel" the travel as you're tripping it. Sometimes it'll travel a bit, then stop, then travel a bit more before firing. Get rid of that "stop". That's where you want it to trip. Don't set it to go off on a "hair trigger". It's fine to have a small amount of travel, but only a small amount. If you take too much off the end of the dog, you'll have a hair trigger that will go off way to easy. Here's the file on the end of the dog.
Go slow and remember, once you take it off, you can't put it back on. For starters, just clean up all the angles(flatten them) on the night latched dog. Then you can go after angle #2 if you want to lighten the pan tension. One other thing...if you bend the dog down to decrease pan tension...it only takes a very small amount. Remember...by bending the dog down, you change ALL 3 ANGLES at the same time.
By fine tuning each angle one at a time, in the correct order, you can adjust these traps exactly how you want them. Here is how a properly filed, and adjusted, night latched dog looks.
If you take too much off the last two angles, don't start sweating and cussing. Just take the medium file, open up all the angles a bit, and start over. I've done this mod to 3 dozen 550's, and have every trap within 1/4# pan tension. I've had them set from 3#, down to 1-1/2# depending on what I'm trapping, and conditions.
550's are getting very popular, and this will help to get a very consistent pan tension. 4 coil 550's will need it too, but every adjustment is magnified. Go slow, and just make 2 or 3 strokes with the file, then check again. I've been using a Sullivans Trap Tester with great results. Wrap the shaft of the tester with duct/Gorilla tape, as the hose that comes with it doesn't last very long. Good Luck!