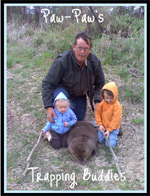
Good job on the fleshing, stretching and this thread.
Some of the things I've learned over the years from Canadians are:
When fleshing do not try to flesh the whole length of any pelt be it beaver, otter or coon. Do it in sections-with beaver I put the center of beaver on end of beam and flesh outwards-from back to belly. Then work my way around-this way ones fleshing stroke is only 10-15" at the most and by working from the back to belly the toughest part is always closest to you except when doing the tail.
Would like to see a more oval stretch-yours look pretty round-I've used the Canadian patterns for over 35 years. To know what pattern to use on a specific beaver hang the fleshed beaver by the nose on a nail-measure the length. Add to it 1/2 the length + 2" on smaller sizes, 3" on mid sizes and 4" on larger sizes. So if hanging it measure 30" add 15" + 2" equals 47" so use the Medium ring. If 36" add to this 18" + 3" equals 57" which is the Large ring. If it measures 45" add 22" + another 4" equals 71" which is Super Blanket or XXL ring. All this said, I understand the sizes on bottom end have changed slightly so my patterns/familiarity are from the 1970's. At a recent convention where Greg Schroeder was demoing beaver he stated that now one should stretch them even longer by using the next size larger for length and the next size smaller for width.
I understand if one has many, many beaver to do that staples are the fastest for boarding but I've always been a hammer/nail(8 penny CC) guy because I can raise the beaver halfway up the nails which helps them dry faster, makes the fur/underfur feel fluffier-more loft plus the nails will bend inwards when leather drys if initially stretched too tightly.